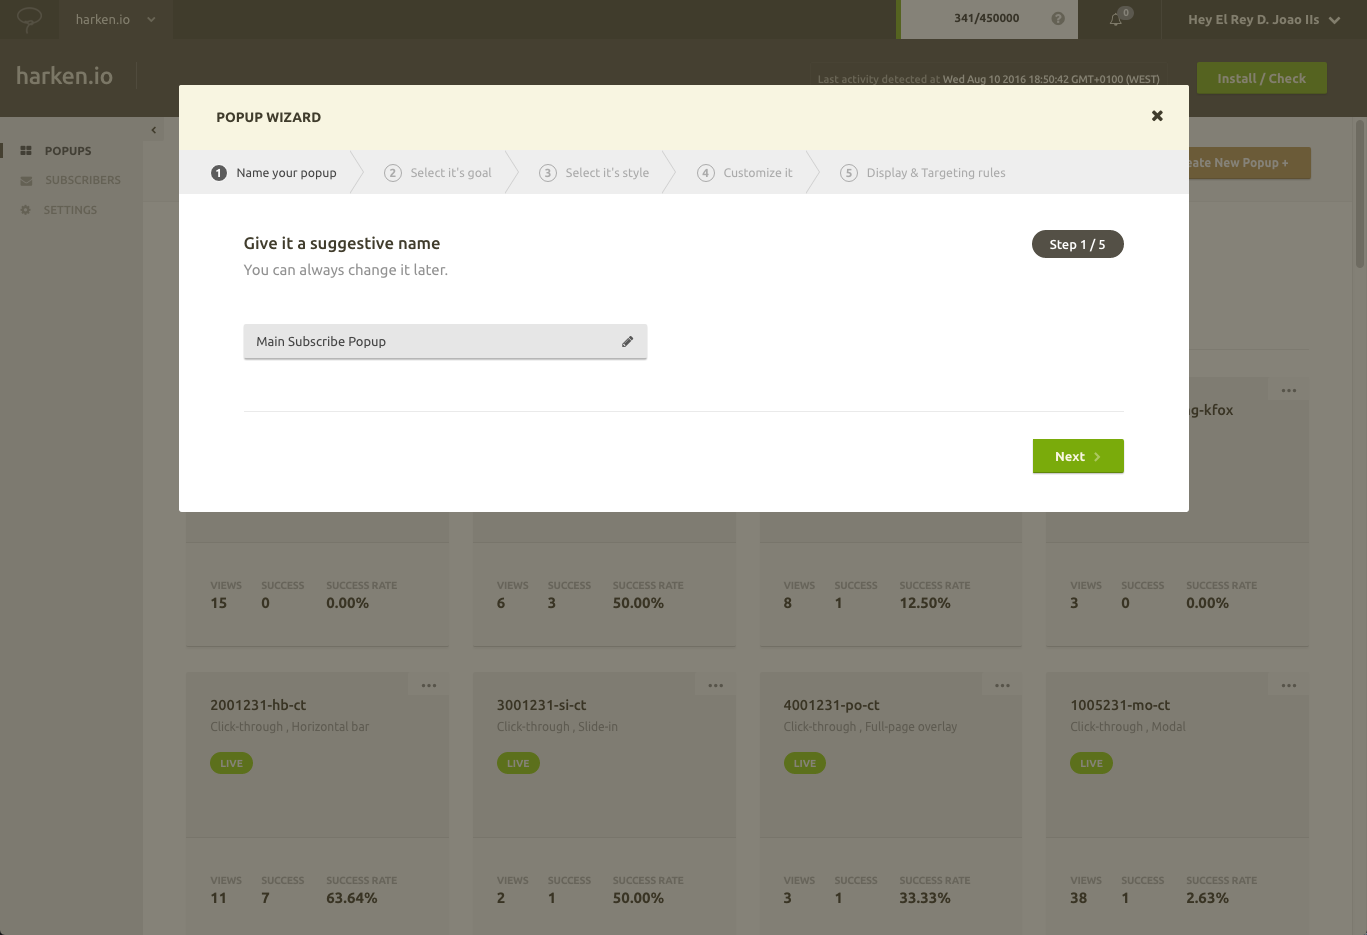
After you’ve installed holdonstranger on your website, you’re ready to create your first popup. Click on Create New Popup + to start.
Step 1) Name your popup
The first step in the Wizard is choosing your popup’s name. We suggest you name it something descriptive so that when you have more than a few popups, you can easily identify them by their names.
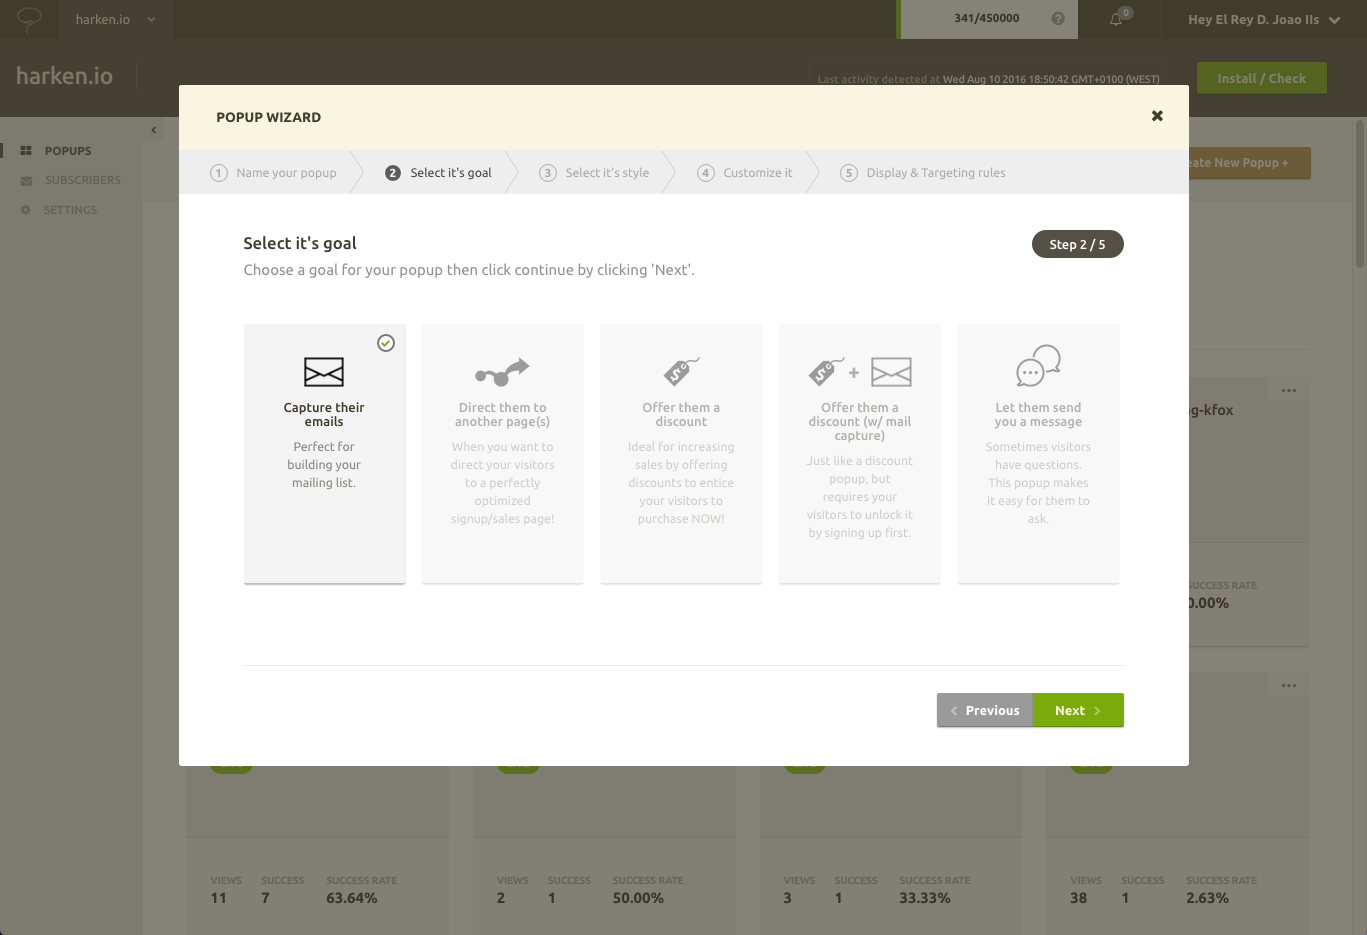
Step 2) Choose it’s goal
The second step is choosing the type of popup you want to create. Currently, there are 5 types: Subscribe, Click-through, Coupon, Subscribe to Unlock Coupon and Contact.
If you don’t know which one to start with, we recommend going with the first one. After all, who doesn’t want to capture more subscribers?
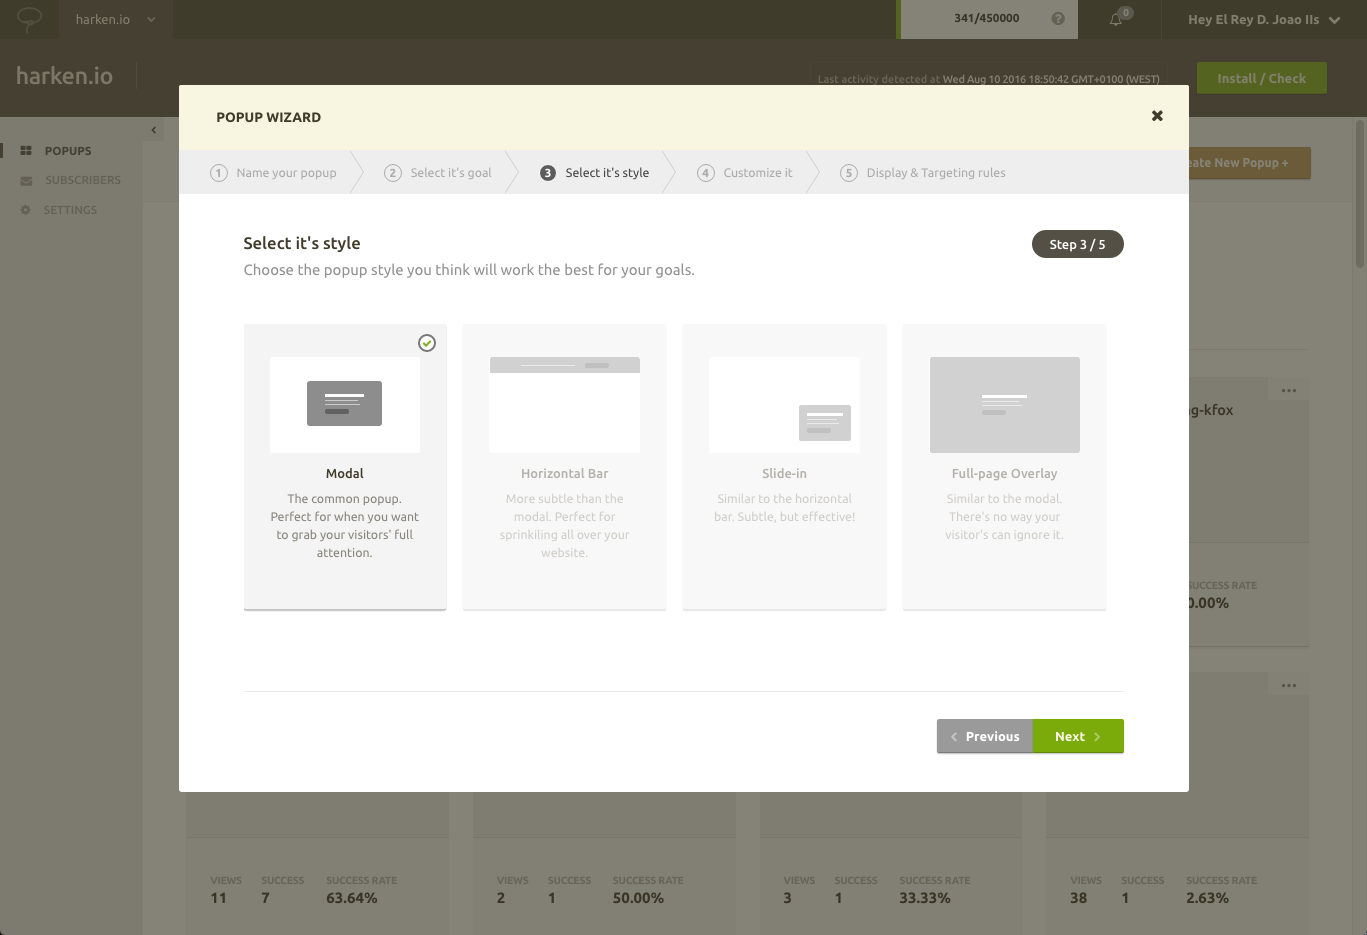
Step 3) Choose it’s style
The third step is choosing the popup’s style. There are currently four styles to choose from: the Modal (which is what you imagine when you think of popups), the Horizontal bar (as the name implies, it’s a horizontal bar that sticks at the top of the page), the Slide-in (a little box that slides in to the page, from the bottom-right corner ), and the Page Overlay (a popup that covers the full page, to garner maximum attention).
Step 4) Editor. The fun part
Complete the third step and you’ll be taken to the Popup Editor. The first time you use the editor a little step-by-step tutorial should begin by itself (which you can always repeat by clicking the question mark symbol at the top-right corner of the editor). It should be enough to guide you through all of the options, but either way, we’ll go over them below:
Step 4.1) Choose a template
Inside the editor, there’s a column at the left of the page with 3 different panels. The first one you’ll see is the Templates panel. Choose your favorite one and move on to the next step.
Step 4.2) Customize the design and edit the text.
The second panel is the Design panel. Change the fonts, colors, animations and other styling options of your popup. Note that different templates may have different styling options.
To edit a popup’s text simply click on the text you want to edit and start typing 🙂 It’s that simple.
Your popups might have different states. In the case of a Subscribe type popup, it has the Initial state, the Error state (when a visitor submits an invalid email, for example) and the Success state (when the visitor successfully subscribes). You can switch and edit all of these different states with the State Switcher located at the center of the top bar of the page.
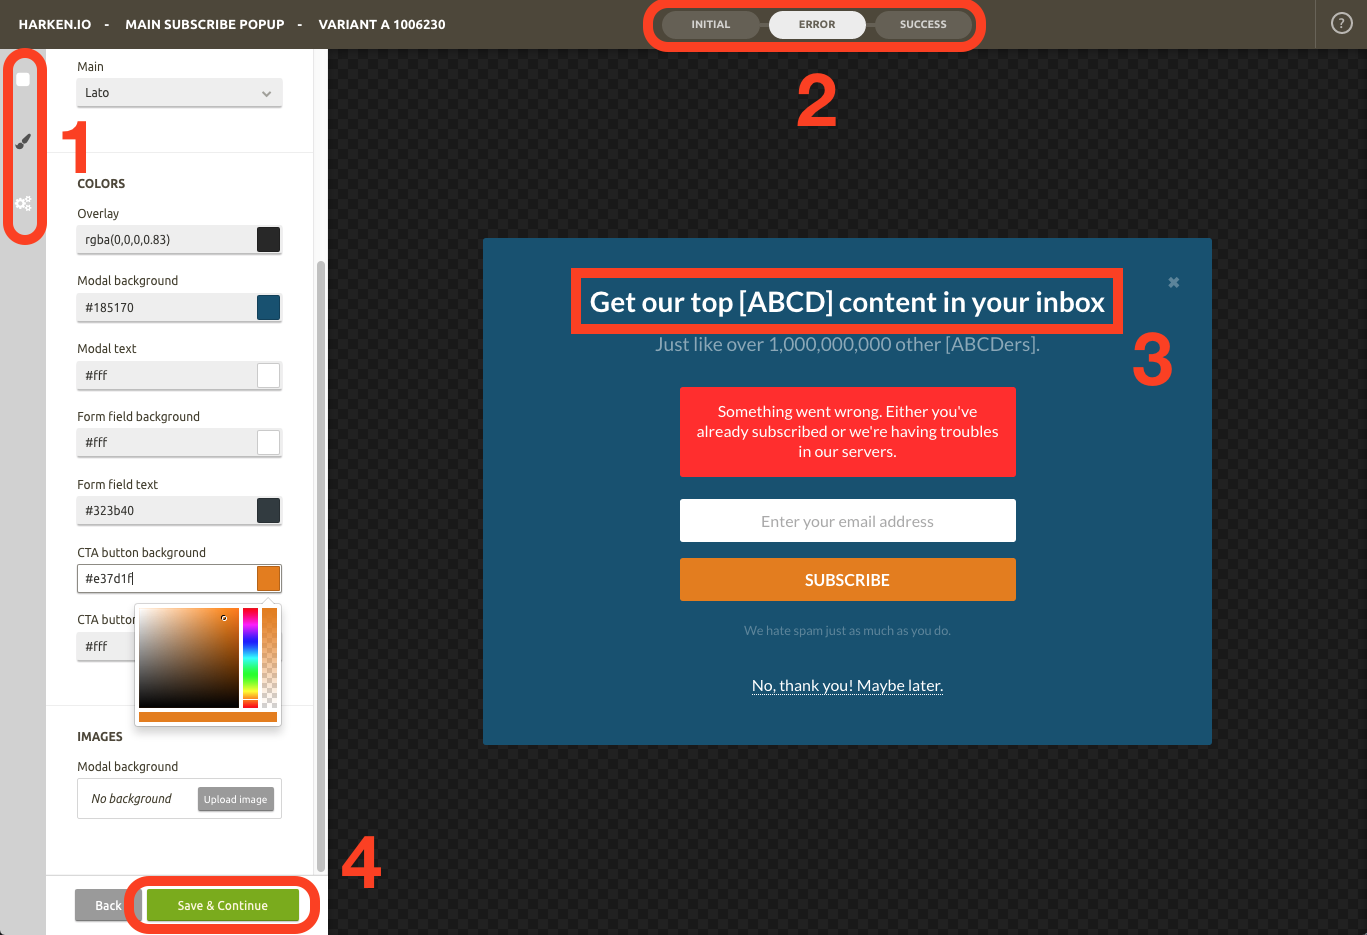
1) Switch between editor panels; 2) Switch between different popup states; 3) Click on a text to edit it; 4) When you’re happy with your popup, click Save & Close to move forward.
Step 4.3) Configure it
The third panel is the Settings panel. You’ll use this one to configure all of the popup’s settings like where the buttons on your popup should link to, where the captured emails should be directed to, discount options, etc. For extra details/help visit the Popup configuration section of the documentation.
When you’re happy with your popup, click Save & Continue to move to the next step.
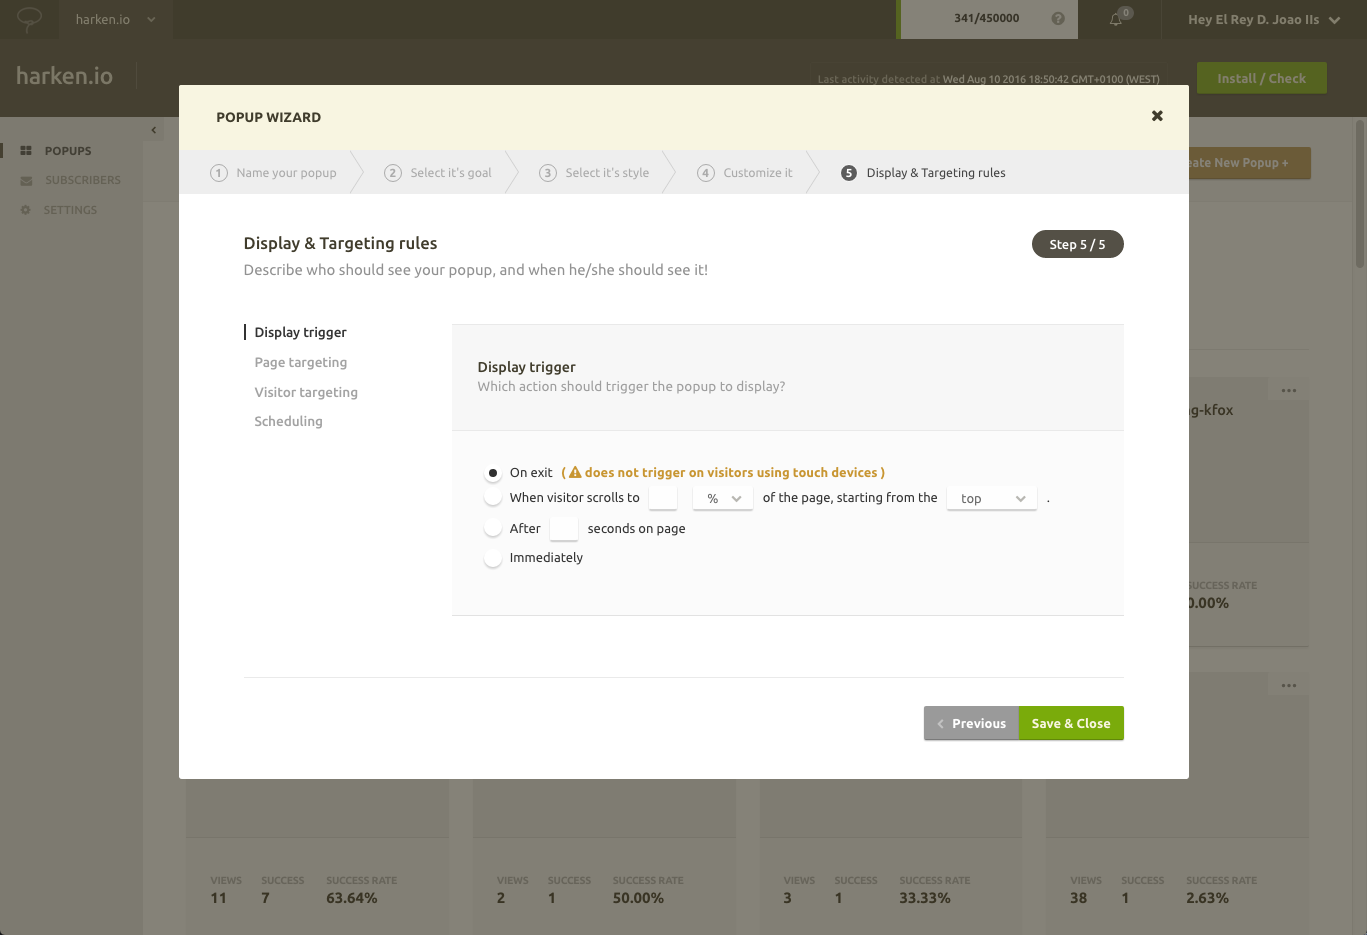
Step 5) Determine where, when and who should see it.
The final step of the wizard is the Targeting configuration. It consists of choosing who should see the popup, on which page(s) they should see it and what action should trigger it to show. For full instructions on this step, visit the Targeting & Triggers documentation.
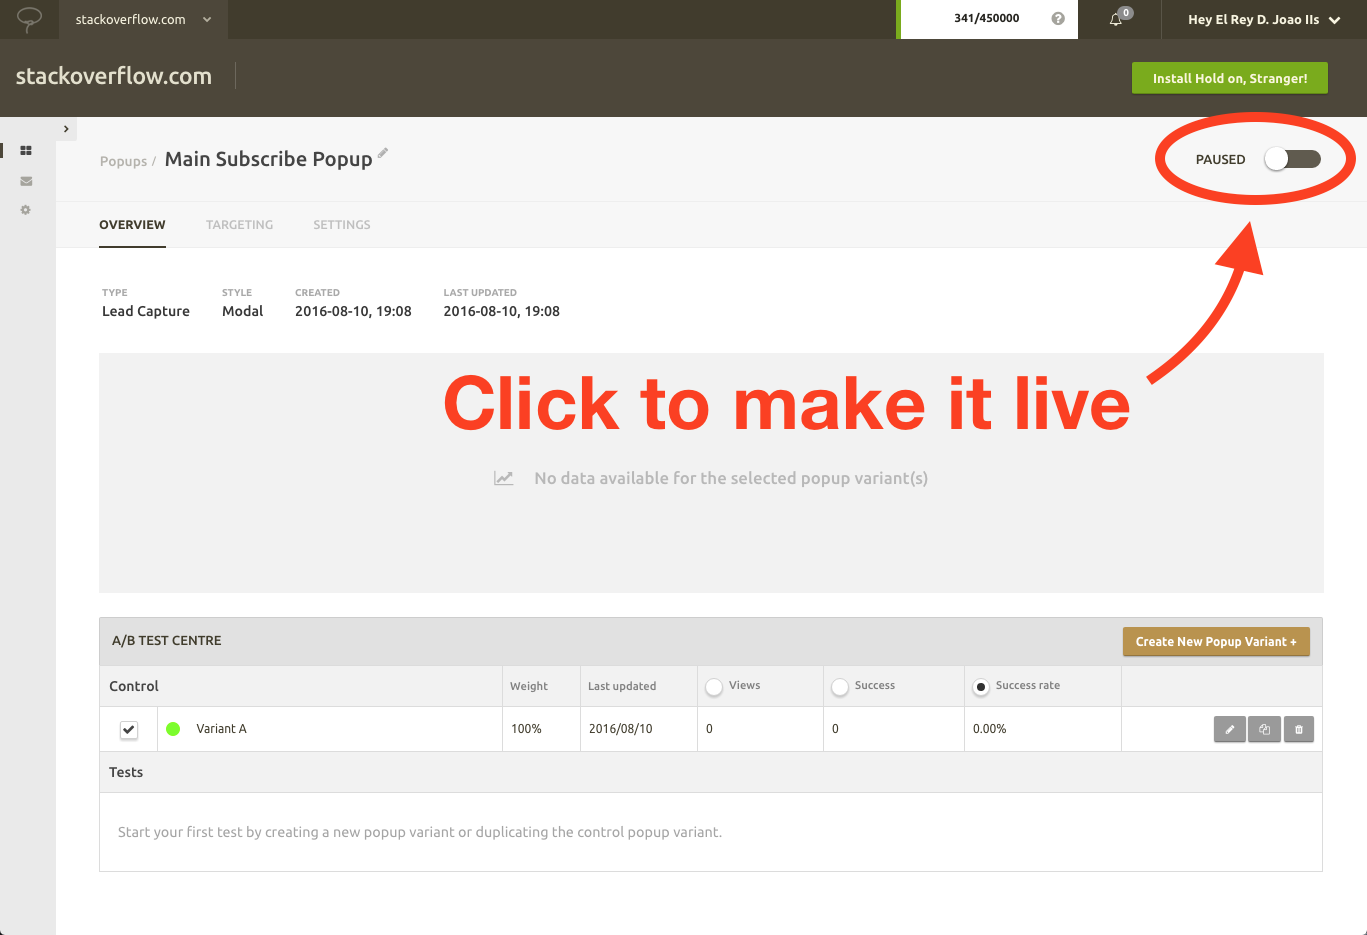
Step 6) Save & Make it Live
When you’re happy with your configuration, click Save & Close and tada! You’ve just created your first popup. But before your visitors are able to see it, you have to actually make it live.
Each popup is represented by a Card on each website’s admin area. Click on a card and you’ll be taken to the popup’s page, where you’re able to see how it’s performing, create variants to test against each other, and make edits to your popups. It’s also here that you switch your popups from paused to live (and vice-versa) by toggling the Popup status switch at the top-right of the page, just below the Install holdonstranger button.