Before installing holdonstranger on your website, make sure you’ve registered it inside your holdonstranger account. If you don’t have a holdonstranger account, click here to get one.
There are two ways to install holdonstranger on your PrestaShop website.
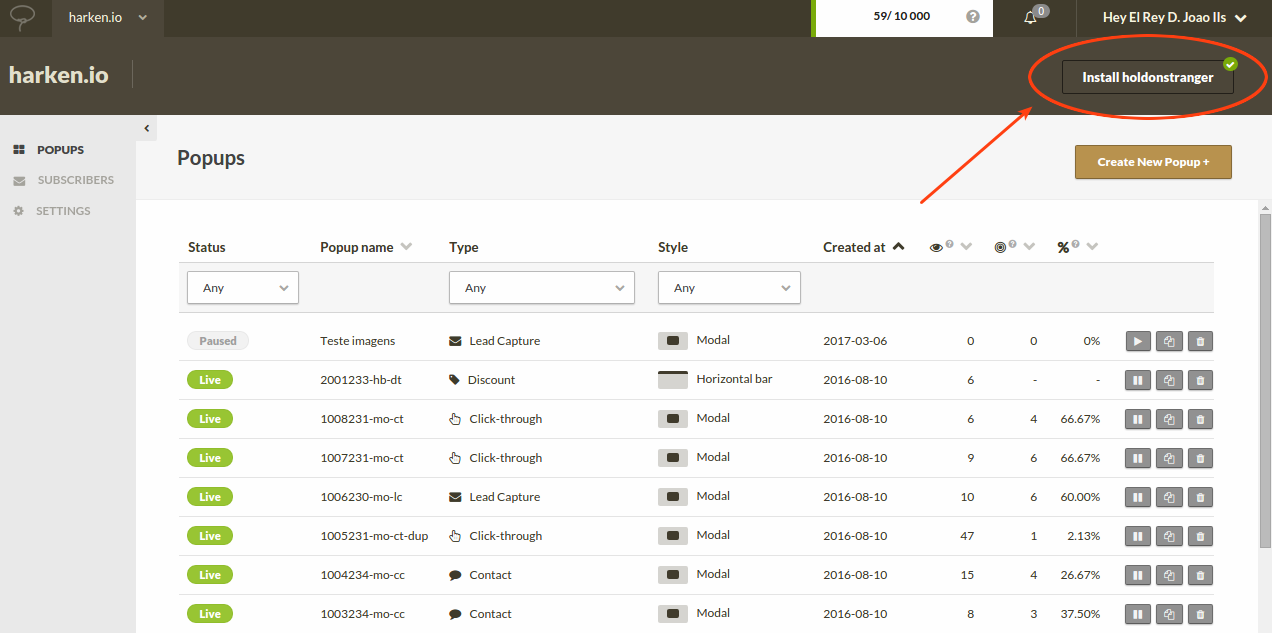
1) Click on Install holdonstranger to open the installation modal.
2) Click the PrestaShop icon.
3) Click Download the PrestaShop plugin button. A .zip file should begin to download in your browser.
4) Log into your PrestaShop account.
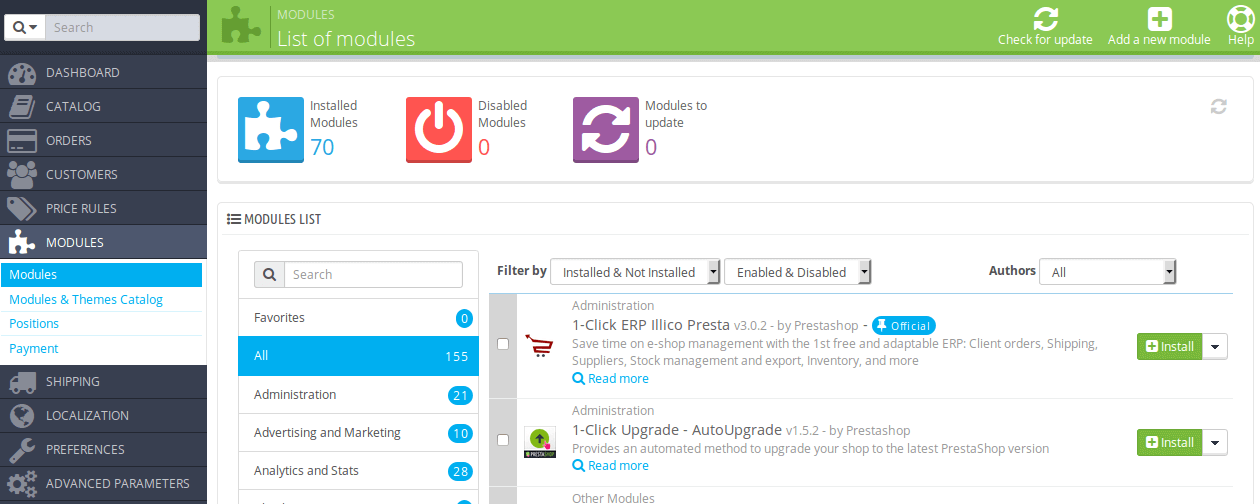
5) Go to Modules.
6) Click Add new module.
7) Click Choose a file. (scroll down the page if you can’t find it at first).
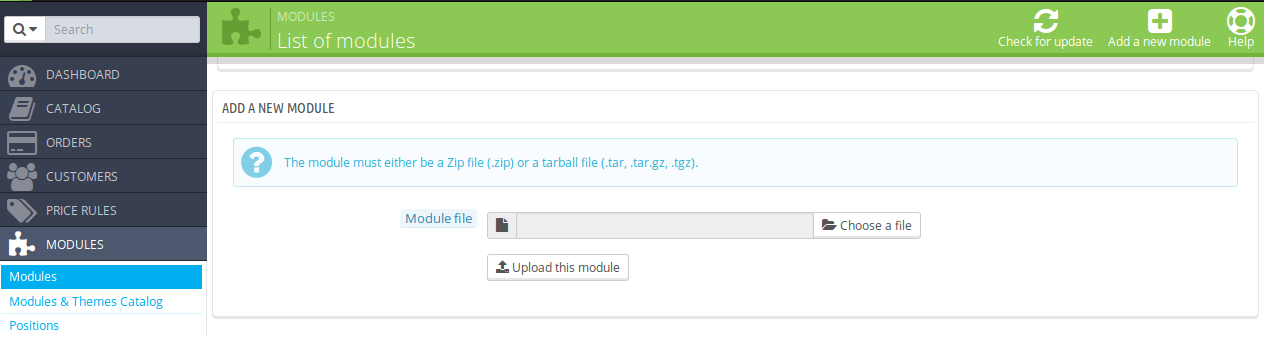
8) Select the .zip file you downloaded from Step 3.
9) Click Upload this module.
10) After the upload’s complete, scroll down to the MODULES LIST section.
11) Type ‘Hold’. That should be enough to find the holdonstranger module.
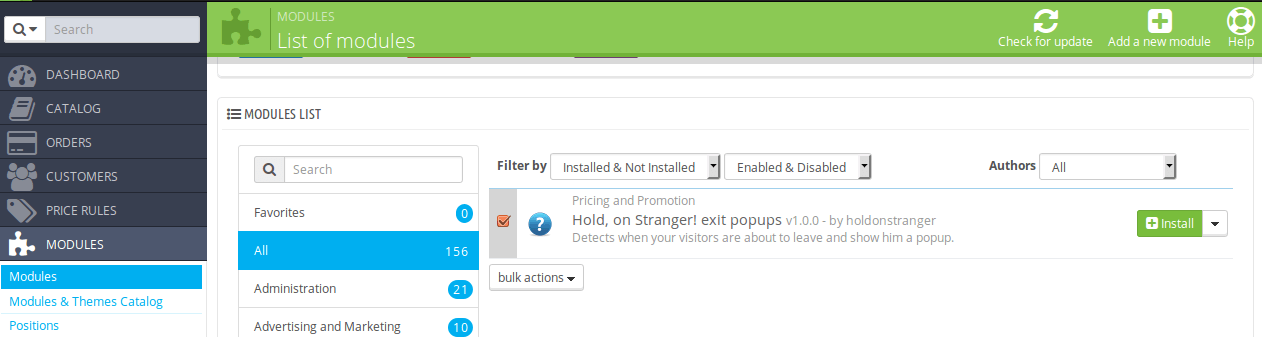
12) Click Install.
13) After the installation’s complete, under the Settings section, you should see a field labeled API Key.
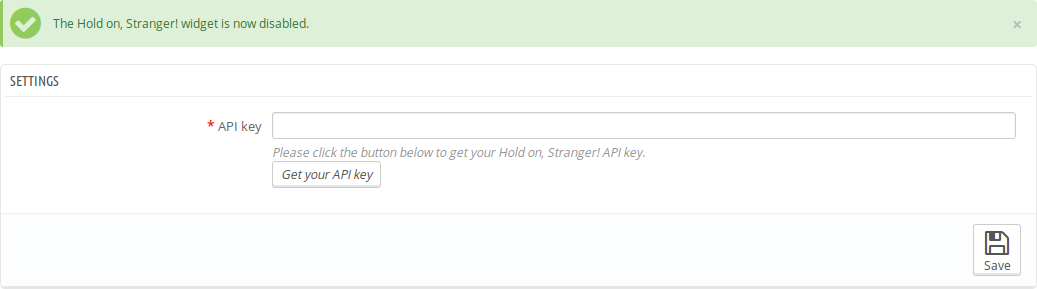
14) Go back to your holdonstranger admin area. Below the Download the PrestaShop plugin button you clicked before, you should find your holdonstranger API key. Copy it.
14) Go back to your PrestaShop admin area and paste the API key you just copied into the field from step 13.
16) Click Save.
That’s it!
To check if it was correctly installed, switch to Check Installation in the installation modal, and click (Re)check installation. Your website should open on a new window/tab. Wait for it to close automatically. If everything went well a ‘Successfully installed’ message should appear.
This step only works if you have access to your server’s command line or if you can edit your website’s files with an FTP client.
Click on Install holdonstranger to open the Installation modal.
IMPORTANT. Click the HTML option, and NOT the Joomla option.
Copy the code snippet.
Using your FTP client or your command line, go to /shopfolder/themes/your-theme, where your-theme should be your website theme’s name.
Find and edit footer.tpl.
Right above the </body> tag paste the following code:
Replace YOUR-CODE-SNIPPET with the code snippet you copied in step 3. It should become something like this:
Save your changes.
That’s it!
To check if it was correctly installed, switch to Check Installation in the installation modal, and click (Re)check installation. If everything went well, at the end of the check, a ‘Successfully installed’ message should appear.